How to Clear/Flush DNS on Google Chrome for Android
In today’s digital age, the Domain Name System (DNS) plays a crucial role in connecting users to websites. However, sometimes DNS issues can occur, leading to problems accessing websites or slow internet speeds. If you’re using Google Chrome on your Android device and experiencing such issues, clearing or flushing the DNS cache can often help.
Understanding DNS and Its Importance
Before diving into the process of clearing the DNS cache on Google Chrome for Android, it’s essential to understand the role of DNS. The Domain Name System is responsible for translating human-readable domain names (e.g., chrome://net-internals/#dns) into IP addresses (e.g., 192.0.2.1) that computers can understand. DNS ensures that when you type a URL into your browser, it can locate the corresponding website’s IP address and establish a connection.
Why Clear/Flush DNS Cache?
Over time, the DNS cache on your Android device can become filled with outdated or incorrect information. This can happen due to changes in website IP addresses or domain name changes. When the DNS cache contains outdated data, it can lead to problems like websites not loading correctly or slow browsing speeds. Clearing or flushing the DNS cache helps resolve these issues by forcing the device to retrieve fresh DNS information.
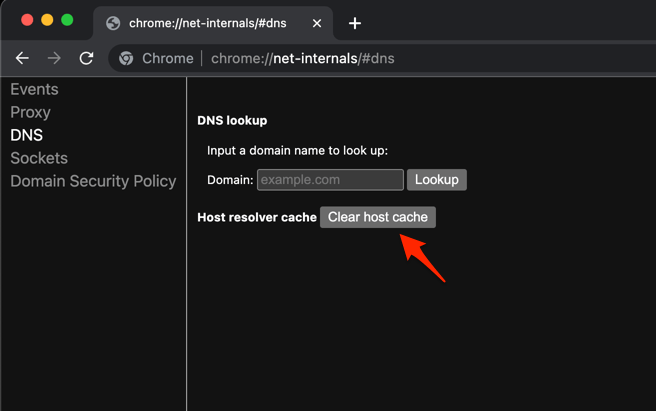
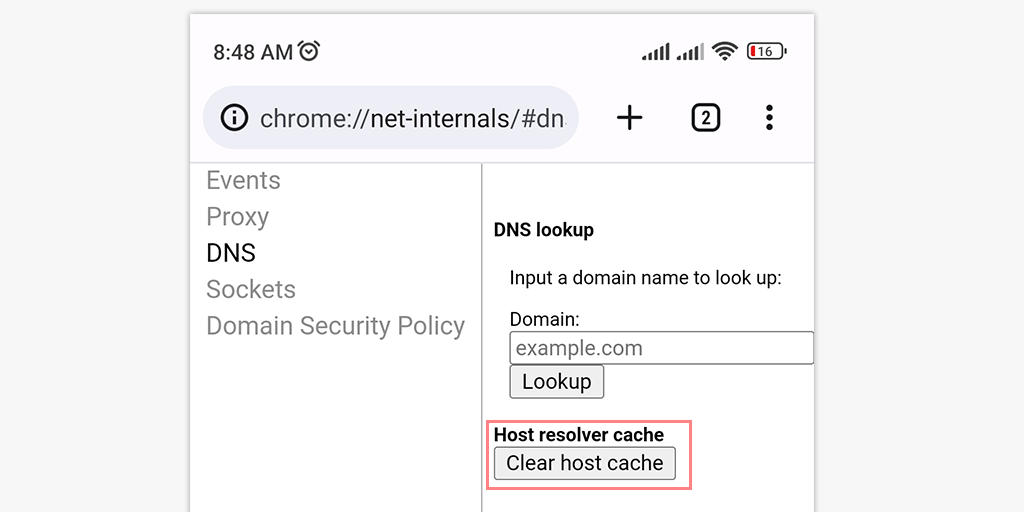
Clearing DNS Cache on Google Chrome for Android
To clear the DNS cache on Google Chrome for Android, follow these simple steps:
Access Chrome Settings
Launch the Google Chrome browser on your Android device and tap the three-dot menu icon located in the top-right corner. From the dropdown menu, select “Settings.”
Clear Browsing Data
In the Chrome Settings menu, scroll down and select “Privacy and security.” Under the “Privacy and security” section, tap on “Clear browsing data.”
Clear Cached Images and Files
Within the “Clear browsing data“ menu, you’ll find various options to choose from. Make sure the checkbox next to “Cached images and files” is selected. You may also select other options as per your preference.
Clear Cookies and Site Data
While still in the “Clear browsing data” menu, ensure that the checkbox next to “Cookies and site data” is selected. Clearing cookies and site data can also help resolve DNS-related issues.
Verifying DNS Cache Clearance
Once you’ve completed the steps to clear the DNS cache on Google Chrome for Android, it’s a good practice to verify if the cache clearance was successful. To do this, close and relaunch the Google Chrome browser, then try accessing websites that previously experienced issues. If the websites now load correctly and the browsing speed improves, it indicates that the DNS cache has been successfully cleared.
Other Tips to Improve DNS Performance on Android
Clearing the DNS cache is one method to improve DNS performance on your Android device. However, there are a few additional tips you can follow to enhance your browsing experience:
Use a Reliable DNS Resolver: Consider changing your DNS resolver to a trusted and fast provider, such as Google Public DNS or Cloudflare DNS.
Restart your Android Device: A simple restart can help refresh various system components, including the DNS cache.
Update Google Chrome: Ensure that you have the latest version of Google Chrome installed on your Android device to benefit from performance improvements and bug fixes.
FAQs
Q1: What is DNS cache?
A1: DNS cache is a temporary storage of DNS information on your device, containing records of recently accessed websites and their corresponding IP addresses.
Q2: Can clearing the DNS cache cause any problems?
A2: Clearing the DNS cache is a safe process and generally doesn’t cause any problems. However, you may need to sign in again to some websites or experience a slight delay in loading the first visit to a website as it retrieves fresh DNS information.
Q3: How often should I clear the DNS cache?
A3: There’s no fixed frequency for clearing the DNS cache. It’s a good practice to do it when you encounter DNS-related issues or periodically to ensure optimal browsing performance.
Q4: Will clearing the DNS cache delete my browsing history?
A4: No, clearing the DNS cache does not delete your browsing history. It only removes the temporarily stored DNS information.
Q5: Can I clear the DNS cache on other Android browsers?
A5: The process mentioned in this article is specifically for Google Chrome on Android. However, other browsers may have similar options in their settings to clear the DNS cache.
Conclusion
Clearing the DNS cache on Google Chrome for Android can significantly improve your browsing experience by resolving DNS-related issues. By following the step-by-step guide provided in this article, you can easily clear the DNS cache and enjoy faster website loading speeds. Remember to periodically clear the DNS cache to maintain optimal browsing performance on your Android device.
Tags:
Recent Posts


Comments are closed.